
Are you a beginner in the exciting world of podcasting and looking for the s equipment to kickstart your journey? Well, look no further! In this article, we’ll guide you through the essential elements of a top-notch podcast setup with the best podcast equipment bundle. Whether you’re focusing on improving sound quality or need user-friendly gear to record and edit your, we’ve got you covered. From a quality condenser microphone and reliable audio interface, like the renowned Focusrite Scarlett, to comfortable headphones, boom arms, and pop filters, this bundle has everything you need. Explore the benefits of both XLR and USB inputs, making it versatile for various recording needs. With this podcast equipment bundle, you’ll be equipped with the tools necessary to create the best podcasts effortlessly.
Best Techniques For Creating a Podcast Guide
Once you’ve settled on a topic for your podcast, the next crucial step is to deliberate on the podcast format. Beyond choosing a subject, there are several considerations to weigh. Ask yourself these pivotal questions:
- What method do you want to employ in conveying your message to the audience?
- What format suits your podcast best? Are you leaning towards a solo podcast, or do you envision having a co-host or guest speaker?
- Have you identified your target audience and taken into account their interests?
- How much time are you willing to invest in crafting content for your podcast?
In the era of podcasting, selecting the right format is essential for success. This guide will aid you in making thoughtful choices for your podcast, whether you’re recording alone or with others. Explore the best podcast equipment bundles, including an ultimate podcast starter kit featuring a condenser recorder, microphone, xlr microphone, and all-in-one recording studio. Dive into the world of podcasting with confidence in 2023, equipped with the essential tools and resources to start and edit your podcast effectively, utilizing cutting-edge audio recording and editing software.
How To Choose the Name of Your Podcast
Naming your podcast is a task that parallels the challenge of selecting its topic. If you’re grappling with choosing the perfect name, consider the following guidelines:
- Ensure the name is relevant to your podcast’s topic.
- Choose a podcast name that captures the audience’s attention.
- Opt for simplicity while aiming for a memorable impact.
Why is it crucial for the name to be topic-related? A name aligned with your podcast’s theme aids discoverability in searches. Platforms like Apple Podcasts display various podcast details during user searches, including the title, your podcast’s name, a subtitle for a brief description, and a summary outlining the episode.
Providing additional details, without divulging too much, enhances Search Engine Optimization (SEO) for your podcast. When creating an Apple Podcast, be thorough in entering details like the podcast’s name, the podcaster’s name, and a concise description.
Consider successful examples like “My Favorite Murder with Karen Kilgariff and Georgia Hardstark” or “Ellen on the Go.” While the former clarifies its content through the name, the latter relies on Ellen Degeneres’s established reputation, complemented by a succinct tagline, “On the Go.”

If naming challenges persist, explore existing podcasts on platforms like Apple Podcasts for inspiration. Collaboration is key, especially when hosting with a co-partner; discuss potential names to ensure alignment. As your podcast grows, invest in top-notch equipment, such as the Shure SM7B, Focusrite Scarlett 2i2, and USB microphones, for optimal audio quality. Elevate your production with built-in recording and editing software, sound effects, and the flexibility of adjustable and all-in-one podcast studio kits. Explore the best podcast starter bundles, enhancing the quality of your recordings and ensuring a seamless transition into video podcasting.
Buying the Best Podcast Equipment
Since the podcast is about recording audio, buying good podcast recording equipment is important. Before you worry about the costs of the recording equipment, here is some encouraging news for you. You don’t need the worry about buying costly equipment to start a podcast because there is a low barrier to entry for podcasting. In this article, I have covered the main equipment needed for podcasting. You can also find information on the equipment available on a higher-end if you want the finest audio quality.
This article will be a guide about “How to start a Podcast?” which is essential for beginners. And I have done extensive research and provided accurate details to keep the cost as low as possible. If you want to start a podcast with more than one person set up, you will find what you want under posts for 2, 3, or 4 persons. If you want to start as a solo podcaster, look under “Podcaster Kit for Solo-caster.”
Computer
Initiating your podcasting venture requires a computer equipped with the latest software version, compatible with both Mac and Windows operating systems. If your computer is approaching a decade in age, it’s advisable to contemplate an upgrade as it may struggle to accommodate the necessary editing software. Seek out a computer capable of smoothly running the required software for your podcasting needs. Ensure it is part of your video podcast recording kit, especially if you are considering video podcasting. Choose a system that best suits your preferences and efficiently supports a podcast setup. When selecting a computer, prioritize features that align with recording your podcast seamlessly, such as two XLR inputs and USB audio interface compatibility.
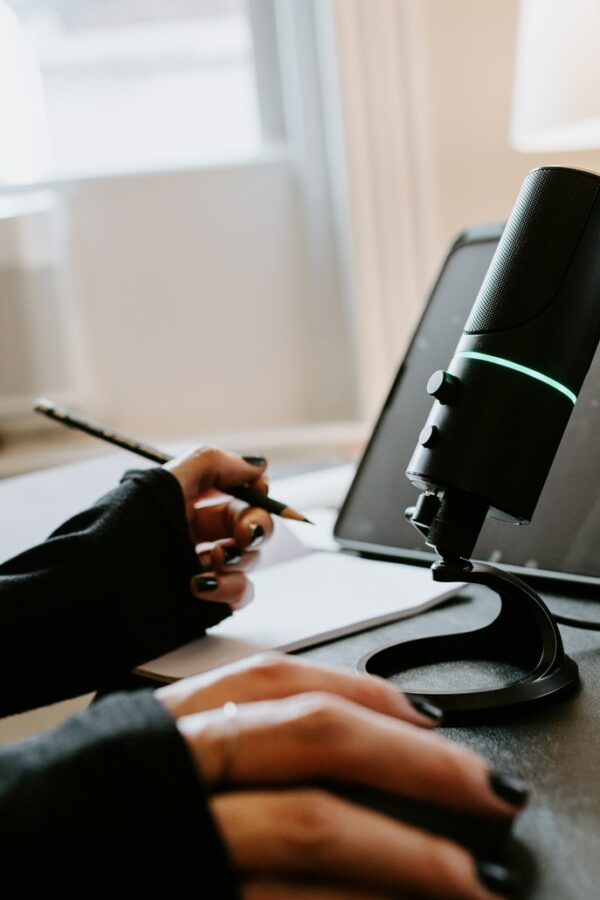
Microphone
Next, you will need a microphone to record your voice. Since there are many types of microphones available for podcasting in the market, make sure you research what microphone will suit best for you. If you are concerned about spending money on a microphone, you can voice record using the mic on your laptop or even with earphones that have a mic.
But there is a disadvantage to this type of recording. When you use the mics on your laptop and earphones for recording, it also records the other sounds around you. It might make the audio unclear and cause an echo to be heard. Though you have cut costs instead of buying a microphone, it means that you are compromising on the audio quality of your podcast. A note to the readers, if you plan to record using the already available mics in your laptop or your earphones, make sure you are following the cardioid pattern. This cardioid pattern eliminates the majority of the unwanted noise while recording.
Microphone Accessories
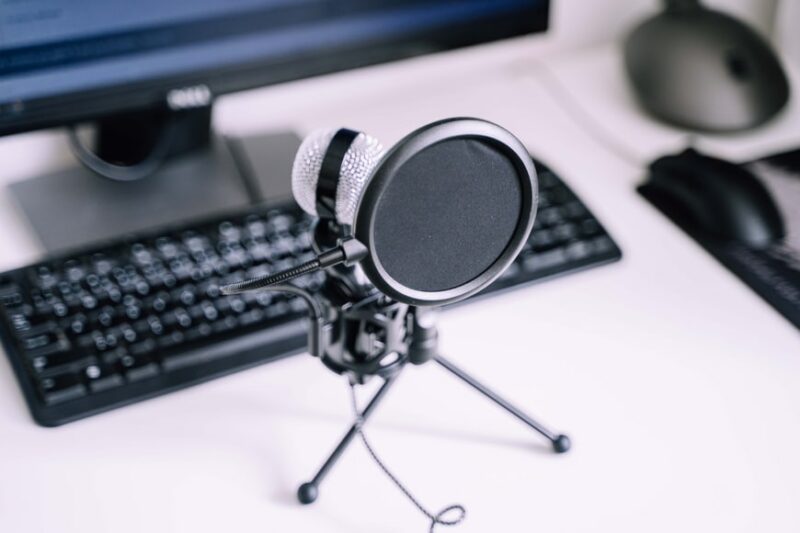
Navigating the world of microphone accessories to enhance podcast audio quality can be a challenging task, particularly for those new to podcasting. Beginning with essential components like a mic stand, boom arm, shock mount, cables, and pop filters is a prudent choice. However, the most critical accessories to focus on are a mic stand and either a windscreen or a pop filter.
Consider the Audio-Technica ATR2100x-USB Cardioid Dynamic USB Microphone, which conveniently includes a tripod stand at no additional cost. This stand, typically priced between $10 – $30, is bundled with the microphone, offering a cost-effective solution. Opting for a mic stand eliminates the need to handle the microphone manually during recording, especially important for those who may struggle to maintain steady hand movements. Even if a live podcast isn’t in the plans and breaks are expected, minimal hand movements can introduce unwanted wind noise into the audio.
When selecting a mic boom arm, it’s advisable to pair it with a shock mount. This addition is indispensable for mitigating noise caused by vibrations from the mic arm. Since mic arms are generally attached to the desk, even slight ambient sounds can lead to vibrations. A shock mount, priced in the range of $20 – $40, effectively minimizes these vibrations.
For a budget-friendly professional podcasting setup, a strategic selection of accessories such as a windscreen or pop filter, mic stand, and shock mount is crucial. These elements contribute to a successful podcast by ensuring professional recording quality, a critical consideration for podcast hosts aiming to launch and sustain their podcasts. Additionally, for those new to podcasting, prioritizing these podcasting starter accessories allows for professional audio recording and editing, even with a portable multitrack podcast recorder.
Additional Podcast Recording Gear
Acquiring podcast recording equipment becomes a necessity when aspiring to host more extensive podcast shows. However, for beginners, the essential podcast starter kit includes just a computer and microphone. Other necessary equipment can be obtained in the long run to ensure the audience enjoys higher-quality audio.
Quality Headphones
Having a reliable pair of headphones significantly enhances the recording and editing process. Headphones serve to monitor audio and facilitate adjustments as needed. They prove especially valuable during editing, providing a clearer understanding of the audio. The Bose Quiet Comfort 35 Series II Wireless Bluetooth Headphones stand out as a popular choice with those looking for best office headset.
Audio Interface and Mixer
Both the Audio Interface and Audio Mixer play crucial roles in making real-time adjustments during recording, ultimately saving considerable time during the editing phase. Acting as intermediaries between your microphone and computer, they are essential if you use an XLR Microphone. Conversely, if you opt for a USB Microphone, there’s no need for an interface or mixer, as you can connect directly to the computer through the USB port.
Acquiring these tools becomes essential when recording multiple individuals to isolate and capture unique voices for subsequent editing. While their prices vary from $100 to more than $300, they might not be indispensable if you’re working within a limited budget. Consider notable choices like the Focusrite Scarlett 2i2 (3rd Generation) for the audio interface and the Yamaha MG10 for the mixer.
Portable Digital Audio Recorder
A Portable Digital Audio Recorder proves convenient for recording high-quality audio on the go. While these recorders can cost anywhere from $100 to over $500, they may not be essential for those starting with minimalist equipment. If planning to record on the road, consider investing in a portable recorder, allowing for the connection of an external microphone to enhance audio quality. The Zoom H4n Pro is an example of a portable audio recorder.
Incorporating these pieces of equipment into your podcasting setup ensures a more comprehensive and versatile approach, especially if you aim to create podcast episodes on the go or delve into music recording. Whether you need a decent microphone, a dedicated microphone, a stereo microphone, or a microphone to capture both audio and video, the right gear can make a significant difference in the quality of your content.
PLAN TO BUY YOUR PODCAST EDITING SOFTWARE
We have the Digital Audio Workstations (DAW) for recording and editing, which provides great free and paid options. For now, we will focus on the free DAW software, but keep in mind that the free software lacks pro features.
Additionally, if you’re looking to free up space on your device by removing unused audio editing software, consider checking out some of the best uninstaller apps available. These tools can help you remove unwanted programs quickly and efficiently, ensuring you have more storage space for the audio projects you actually care about.
RECORD YOUR FIRST EPISODE
Phew, you have finally set up all the equipment you need to start a podcast! Now is the time to start your recording! When recording your first podcast, remember that this is your first podcast, and you don’t have to be perfect. Learning to podcast is an ongoing process, and you will master it as you continue to record. Have fun while recording, and you will notice that you got comfortable with recording and will soon find your niche.
Ensure you have the right equipment, such as a reliable broadcast microphone and a quality studio microphone, along with a comprehensive recording studio package to enhance your podcasting experience.
PREPARE AN OUTLINE OR SCRIPT FOR YOUR PODCAST
Drafting a blueprint or script for your podcast is a crucial step in planning the content you wish to convey to your audience. Create an outline detailing the introduction, jot down ideas spontaneously as they arise, keeping the tone as casual as possible, and refine it later. Opting for a structured script is even more beneficial, but bear in mind that during delivery, strive to avoid sounding as if you are reading directly from the paper.
For optimal podcast production, consider investing in a reliable cardioid condenser microphone and accessories like the Rode PSA1. Equip yourself with the essentials for a professional recording setup, including a professional recording studio, a comprehensive podcast kit, and a kit that meets your specific needs.
CHOOSE YOUR RECORDING SPACE
Okay, so I’m starting by saying that you do not need a professional studio to start your podcast. Pick a room with little echoes, like the place where the sound fades away as soon as it leaves your mouth. One great way to reduce echo is by filling the room with egg carton foam, also known as acoustic panels. You might have seen these acoustic panels on the walls of several Youtuber’s videos. They do not absorb sound; instead, they reflect the sound not to create echoes.
SET UP EQUIPMENT AND RECORDING SOFTWARE
Begin by connecting your microphone to the computer and setting up the recording software. First of all, check if your microphone is connected to the audio input setting of the recording software you use (e.g., Audacity). While recording a podcast with multiple speakers from different locations, you can use Skype, Zoom, Google Hangouts, Google Meet, and other online meeting platforms to record.
TAKE A BREATH AND RECORD!
Now that you have set everything up click the record button! As it is your first time, take breaks whenever needed. Professional singers don’t drink soda during their breaks as they know that any liquid other than water can lead to dryness. Stay hydrated and drink water to avoid voice adjustments. If you stutter in between, pause for a while, take a break, and start again. Remember this podcast is not live, and you can edit any mistakes in your audio later.
EDIT YOUR FIRST EPISODE
Now that you have finished recording your first podcast, give yourself self-appreciation. Many people quit podcasting even before they begin to record their first episode. You have achieved a huge milestone by recording your first podcast. Now recording the rest of the episodes will be easy for you. After recording, now is the time to edit, mix and master the podcast.
Look back and think about the first podcast you listened to. Try to remember how the audio quality was. Have it in mind that you are editing your podcast. So if you have any doubts or in need of ideas, you can listen to other podcasts anytime. Open the editing software you use, and begin editing. Edit if you find any awkward silences in the audio; edit out the parts where you find any stuttering, stammers, uhms, etc. If you think that there are places where you found yourself rambling in between, edit it out too. Make sure that throughout the audio, there is uniformity in the volume.
Add ID3 tags to your audio before exporting your MP3 files. This enables you to store information on your podcast like title, artist, date, cover art, descriptions, etc. If you add any music to your audio, you need to export the MP3 as 192 kbps or 44.1 MHz sample rate stereo. If you did not use any music, the minimum bitrate needed is 96 kbps.
FINDING ROYALTY-FREE MUSIC
You need to include a list of things in your podcast: intro, intro music, outro, and other music to use in between segments. Go back and listen to your favourite podcasts and pay attention to the intros, outros, and music. You don’t need highly produced music when you start your podcast. You can do later even after you find your way into podcasting.
Before you think you need to hire a music composer, try sites like Incompetech (free) or Shutterstock (paid) for royalty-free music. They have a variety of music, and you will find something that works for you. You only need to download the music and import the music to the editing software.
Episode Clips
While editing the audio, decide the fun and interesting parts of the episode. After you are done with editing, make one or two audio clips that can be used for marketing and promotional purposes later. These audio clips give listeners an idea of what they can expect from your podcast.
Professional Audio Editing
As podcasts only are about audio, we need to make sure that the 30 – 45 minutes they spend listening to your podcast is worthwhile. As your podcast’s audience starts to grow, your revenue will increase. Now you can seek the help of editors from big sites like Fiverr and Upwork.
UPLOADING AUDIO TO THE HOSTING SITE
The podcast hosting site is where you upload your MP3 file. These hosting sites help you get the RSS feed, and it will be used to submit your podcast in the podcast directory. Several podcast hosting platforms like SoundCloud, Libsyn, Buzzsprout, and Podbean. Out of these sites, Buzzsprout and Podbean are free sites, and both are good podcast hosting providers and distribute your podcast for free. Check out which site is best for your situation.
Buzzsprout allows people to upload 2 hours of audio each month, and the episodes are removed after 90 days. But you have got 3 months to try the platform for free. If you upgrade to the lowest paid plan, you can upload 3 hours of audio each month and no 90 days limit on the episodes. A major advantage of using Buzzsprout or Podbean is that your podcasts are submitted to different directories like Apple Podcasts, Google Podcasts, Spotify, etc.
FILL OUT PODCAST DESCRIPTION
You will need to fill the name of your podcast’s episode and description. Be clear and concise about what your episode is about so that people will find your podcast unique and intriguing. You don’t have to worry if once you write a title and description, will it be fixed permanently. No, you can revise them anytime you want.
VISUAL BRANDING FOR PODCAST
The branding for your podcast begins with the cover art. Go to the podcasts in Spotify and Apple Podcasts. Now scroll down and see which cover art caught your eye. And then think about the following-
1. Was it the colours that you found attractive?
2. What was the font size and type?
3. What artwork was used in that cover art?
CO-HOSTING AND GUEST SETUP
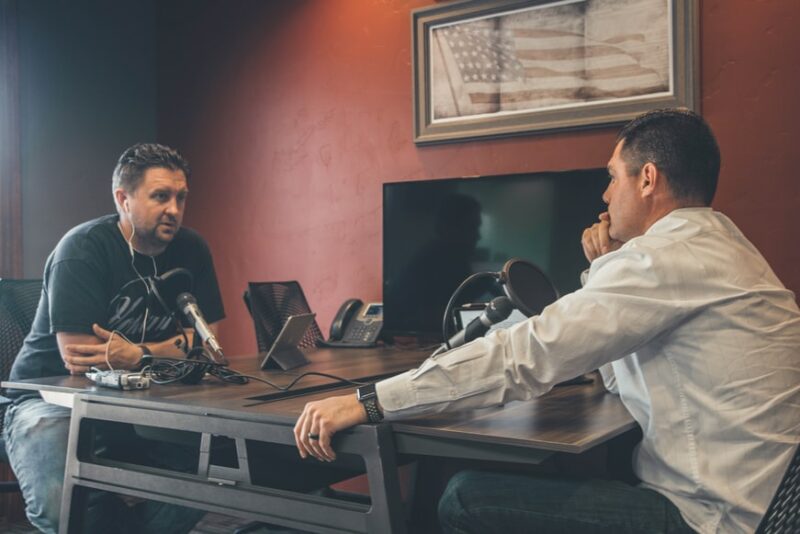
Now let’s delve into the shared podcast setup. This setup applies when you invite a co-host or another guest speaker for your podcast. The more the guest speakers in your podcast, the more engaging your podcast will be. This will enable the audience to hear authentic exchanges about a certain topic. It is best advised to keep the speakers to 4 or fewer people. The main reason behind limiting the participants under 4 is that when there are many people in the room, the conversations sometimes get interrupted or overlapped. This would be a headache for the audience to follow. And the recording and editing process will be a miserable process.
Beginner Podcast Starter Kits
If you’re just starting out, it’s crucial to think about both the skills of your guests and your budget when setting up for podcasting. Ensuring that each participant has their own microphone and headphones is essential for a smoother recording and editing process. Trust me, trying to edit with a single microphone can be quite a hassle.
Considering the limited USB ports on most computers, you might want to invest in an audio interface to accommodate all participants. Also, double-check that the outputs from your mixer are compatible with the input microphones.
For beginners, here’s a suggested setup for each speaker:
- Microphone: Behringer Ultravoice Xm8500 Dynamic Vocal Microphone XLR
- Mic Windscreen: On-Stage Foam Ball-Type Microphone Windscreen
- XLR Cable: CBI MLC LowZ XLR Male to XLR Female Microphone Cable, 20 Feet
- Headphones: Audio-Technica ATH-M30x Professional Studio Monitor Headphones
- Headphone Amplifier: Behringer Microamp HA400 Ultra-Compact 4-Channel Stereo Headphone Amplifier
- Audio Cable: Hosa HSS-005 REAN 1/4″ TRS to REAN 1/4″ TRS Pro Balanced Interconnect, 5 Feet
- Mixers and USB Interfaces: Depending on the number of people, you can go for options like Focusrite Scarlett 2i2 (3rd Gen) USB Audio Interface with Pro Tools | First, Red (AMS-SCARLETT-2I2-3G), BEHRINGER, 12 Mixer – Powered, Black (Q1202USB), or Tascam US-4×4 USB Audio/MIDI Interface with Microphone Preamps and iOS Compatibility.
Remember, your setup should cater to your needs and your guests’ comfort, making the podcasting experience enjoyable for everyone involved!
Intermediate Podcasting Kits
If your budget isn’t a hurdle anymore and you’re ready to step up the game, it’s a good idea to invest in higher-quality equipment. Although there’s not a huge gap between the starter and intermediate kits, choosing gear that elevates your audio quality is the way to go.
For those in the intermediate phase, here’s a tailored setup for each individual:
- Dynamic Microphone: Audio-Technica AT2035PK Vocal Microphone Pack for Podcasting
- Headphones: Audio-Technica ATH-M50x Professional Studio Monitor Headphones and audio equipment
- Mixers and USB Interfaces: Depending on the number of people, you have a range of choices such as Yamaha AG06 6-Channel Mixer / 2 Microphone, Focusrite Scarlett 2i2 (3rd Gen) USB Audio Interface with Pro Tools | First, Red (AMS-SCARLETT-2I2-3G), Mackie ProFXv2, 8 A-B Box, 8-channel (PROFX8V2), Rode RODECaster Pro Integrated Podcast Production Studio, PreSonus Audio Interface, 4 Mic Pres – 4 Line Outs (Studio 68), Mackie, B Box, 12-channel (PROFX12V2), and Focusrite Scarlett 18i20 (3rd Gen) USB Audio Interface with Pro Tools.
Remember, at this stage, it’s about refining the quality of your setup to enhance the overall podcasting experience. Choose what aligns best with your preferences and style, ensuring that each participant enjoys a top-notch audio environment!
Experienced Kits
For seasoned speakers, here’s a selection of equipment tailored to meet your advanced needs, though it does come with a higher price tag.
For experienced individuals, here’s what we recommend for each setup:
- Bundle: Heil Sound PR 40 Dynamic Cardioid Studio Microphone Bundle with PRSM Shock Mount, PL2T Overhead Studio and Broadcast Boom Mount, and Microphone Cable
- Headphones: Audio-Technica ATH-M50x Professional Studio Monitor Headphones
- Mixers and USB Interfaces: Depending on the number of people, you have a range of sophisticated options such as Universal Audio Apollo Twin USB High-Resolution USB Interface with Realtime UAD DUO Processing, Rode RODECaster Pro Integrated Podcast Production Studio, Focusrite Scarlett 18i20 (3rd Gen) USB Audio Interface with Pro Tools, Allen & Heath ZED-12FX 12-Channel Mixer with USB Interface and Onboard EFX, and Focusrite Clarett 8Pre USB 18-in/20-out USB 2.0 Audio Interface.
At this stage, it’s about investing in top-tier equipment to elevate the quality of your podcast production. Choose what aligns with your preferences, ensuring each participant enjoys a professional-grade audio experience!
EQUIPMENT REQUIRED BASED ON EXPERIENCE
Best Podcast Equipment Bundles for Beginners
Condenser Microphone Kit
If you have money left that you are willing to spend and expect the podcast to be done all by yourself with no guest speakers, here are a few things you need to buy. All these put together will cost around 300 dollars.
You can buy our favourite Blue Yeti or a similar USB microphone, a good quality POP filter, and headphones for monitoring audio. This combination is the best condenser microphone kit, and it will never go wrong!
2 or more speakers
The basic podcasting kit is the same as the single-speaker budget kit. You can buy an ATR 2100 microphone which has XLR and USB connections. You can use any number of mics and an audio interface or mixer to meet your needs. The XLR microphone and monitoring headphones are essential for this setup.
Podcast Equipment for Intermediate Podcasters
Intermediate-level podcasters can choose to buy a high-quality microphone with a good stand and shock mount. The remaining equipment remains the same. For the microphone, you can choose the Rode Podcaster USB dynamic microphone. The microphone mentioned above is so satisfactory that it brings your podcast to life. These are the best options for a USB microphone kit.
MOST BASIC PODCAST BUNDLES OR EQUIPMENT
Microphones
The microphone is the pivotal equipment that you need to buy for podcasting. Without a microphone, you cannot record anything. Many readers asked us this question, “Which is the best microphone for recording?” We recommend the USB microphone or a studio condenser mic. A lot of the kits mentioned above include the best-quality condenser microphones. Condenser microphones are great at recording vocals.
Audio Interface / Mixer
To power up the condenser microphone, you need a proper device. For this, the best solution is to use an audio interface, which provides phantom power that makes condenser mics work, but it also has more ins and outs to connect headphones, instruments like guitar, or MIDI to play keyboard. These interfaces or mixers also efficiently process our vocals.
Software
While discussing “podcast software,” we need to be aware that there isn’t much software dedicated to focusing on podcasting solely. We have compiled some types of software that can be used to record and mix and finalize them. You can read our best podcast software or free music software to explore options.
Headphones
Headphones are available in many shapes and sizes, and we recommend you to use this one design for podcasting which is the closed-back, dynamic and over-ear headphones. Does this name sound like Latin and Greek to you? Then fear not; all you need to look for is – there will be an ear cup in your headphones that goes over your ear and does not allow sound to leak into your microphones with the “closed” back. Any studio headphones can be used, provided they have a closed-back design.
Cables
All the podcast bundles will come with cables compatible with the equipment. But if you are planning to buy separate cables, make sure that they can be suitable for the device you need to hook them upon. Double-check if the cables are compatible with the gears you purchased.
Camera
This is the last place on this list because it is entirely optional to buy a camera. If you are planning to film your podcasts, you can buy a camera. Some people might want to purchase a camera for vlogging their podcasts, but it all depends on your preferences.

TOP PODCAST EQUIPMENT BUNDLES
PreSonus AudioBox 96 Studio
- Headphone jack with level control
- Zero-latency monitoring with the use of internet analog mixer
- 24-bit resolution, 44, 48, 88.1, and 96kHz sampling rate interface
- 48V phantom power if using included 47 microphones or any other condenser mic
- 1/3U rack-mountable
- Computer to interface connection cable is included
- Check prices\reviews: US | UK
This is one of our topmost favourite picks. It comes with headphones, mic, and interface and a modern Digital Audio Workstation (DAW). This bundle can function effectively in both 32 and 64 bit applications. The design is simplistic and it has the popular AudioBox interface. This interface is the best because it gives you two combo instruments input and zero latency monitoring, so when you use this bundle you can begin recording right away. Another popular feature of this bundle is that it includes the M7 large-diaphragm condenser microphone, which is a very high quality microphone. Also another point to be added is that this bundle can be used with Mac or Windows too. The PreSonus AudioBox 96 Studio covers every aspect of what we discussed, perhaps just excluding the camera.
Behringer Podcastudio - It includes USB/audio interface, mixer, microphone and headphones too
- Offers a vibrant broadcast-style microphone that includes a 2-stage pop filter
- High performing studio headphones which has ultra-wide frequency responses
- Detailed podcasting software and an ideal audio editor
- Optimal for professional podcasting, music production and digital home recording
- High-resolution 2 In/2 Out USB audio interface that comes with plug-and-play for Windows SP (or higher) and Mac OS X operating systems
- See pricing\reviews: US | UK
This professional podcasting bundle comes up with all the features needed to make high-quality podcasts. Podcastudio comes with headphones, a USB interface, and a mixer, which you need, and you do not have to shop for any other extra equipment. This podcast bundle helps you find the perfect sound you are looking for, but all at an affordable price. Though this gear is not high-quality compared to the AudioBox Studio, if you want to save money as you are only beginning, then this is the best bundle.
Focusrite iTrack Studio - An industry-leading recording bundle for your iPad, Mac, or PC
- Top of the line CM25S condenser microphone
- Equipped with HP60S closed-back studio headphones
- Easily connectible for instant recording
- Interface features include unique Signal Halo LEDs in addition to a large monitor level control
- Focusrite iTrack Solo audio interface with awesome Focusrite pre-amps (up to 24bit/96KHz audio quality)
- Includes all cables (XLR, 1.2m Device Link cable)
- Equipped with Ableton Live Lite and Scarlett VST/AU/RTAS Plug-in Suite
- Novation Bass Station synth plug-in and Loopmasters sample content included
- See reviews\prices: US | UK
This is a very high-quality studio bundle which offers you everything to record the excellent sound for your podcast. This works on Mac, PC or any type of laptop too. It also comes with the software Ableton Live Lite, which is very popular. If you are beginning to podcast, but want a software having higher quality than Podcastudio, you can buy Focusrite iTrack Studio.
MXL VRS Solo - Large Diaphragm Broadcast Dynamic Microphone included
- Four inputs, one output, USB 3.0 for a dynamic sound
- Desk stand to hold your microphone
- Equipped with a Universal 1/4”-20 Camera Clip Mount
- Includes an XLR-to-USB adapter for increased gain control
- Full HD Camera with USB 3.0 included
- Read reviews\pricing: US | UK
This bundle is amazing as it is a package of high quality equipment put together to make your live podcasting and online web streaming easier. If you are pretty serious about filming, then here’s some good news. This bundle can be used for producing music, web conferencing, podcasting and anything else that needs to be recorded. But you need to buy the HDV Mixer software separately as it does not come along with this bundle. To take your podcast to the next level, then you can buy this bundle.
IK Multimedia iRig Pro Duo Studio Suite - Equipped with 2-hi-quality preamps with gain control
- MIDI input/output included
- Lightning, USB and USB OTG cables offered with package
- High Output drivers for a more accurate and stronger sound quality
- Extended frequency response for a high-quality bass
- Adjustable headband for optimal support and great comfort so that you can listen longer without fatigue or discomfort
- Closed back design for monitoring while recording without needing a mic bleed
- Check prices\reviews: US | UK
This is a podcast bundle which is really good, and is one of the best podcast bundles which has high-level capabilities. This package offers you a dual-channel audio/MIDI interface so that you can connect your mic and obtain an ideal 24-bit sound. You just have to plug and play the sound, so that you can record. It also provides 2 channels with XLR/TRS combo audio jacks with phantom power, which is best suited when the recording involves more than one person. If this bundle fits your budget, then it is a must buy.
Scarlett 2i2 Studio - Offered with noise cancellation HP60 closed-back studio headphones
- CM25 large diaphragm condenser microphone included
- Equipped with a XLR mic cable and stand clip
- 20 Hz – 20 kHz frequency response
- Dynamically 106dB weighted
- +4dB Maximum input level
- 50dB gain range for further sound travel
- Read reviews\price: US | UK
The Scarlett 2i2 Studio provides you crystal clear sound quality. This bundle has everything that will take your podcast to a higher level. It is user friendly and can be used by a beginner or even an experienced podcaster.
M-Audio Vocal Studio Pro II - Waves plugin pack offered, as well as a convenient mic clip
- USB cables to simplify your plug and play methods
- Headphones with self-control features for private recordings
- 2 XLR + ¼” combo inputs with phantom power recording vocals, guitars, and bass
- Studio-quality audio recordings that contain up to 24-bit/48kHz resolution
- Ableton live lite included for recording, mixing, and music production
- Top-notch condenser transducer
- High sensitivity and low self-noise
- Built-in pre-amplifier circuitry for an out of this world sound performance
- View prices\reviews: US | UK
Last but not least on this list, this bundle is the real deal. If you are looking for a bundle which makes your work as a podcaster easier, then this is the best bet. It helps you complete computer based recordings with high level features, and the hardware makes the whole job easier.
BUDGET-FRIENDLY EQUIPMENT PACKAGES
The Blue Yeti USB Microphone
The Blue Yeti USB Microphone is a preferred choice for many YouTubers and podcasters due to its features tailored for beginners. Here’s why it has garnered such popularity:
- USB Compatibility: It’s compatible with both Mac and PC, making it versatile and accessible.
- Convenient Controls: The inclusion of a gain control knob, mute button, and zero-latency headphone output offers easy and quick adjustments, enhancing user convenience.
- Multiple Pattern Selection: It provides various pattern selections, including cardioid, bidirectional, omnidirectional, and stereo, catering to different recording needs.
- Design: The Blue Yeti boasts a robust and sleek design, striking a balance between durability and aesthetics.
- Usability with External Tools: For podcast episodes conducted via Skype or any work involving audio editing tools like Garageband, the USB compatibility of the Blue Yeti is a clear advantage.
Furthermore, the microphone eliminates the hassle of searching for controls on your computer for functions like adjusting gain or volume. With the Blue Yeti, you can effortlessly configure these settings directly on the microphone itself. It’s a no-brainer for those seeking a user-friendly and versatile microphone for their content creation needs.
Adjustable Boom Microphone Clip
The Blue Yeti comes with a sturdy stand but if your table is short, you might feel the need to lean down to talk into the microphone. While this might be helpful initially, you can always do your podcast like this. And that is why I recommend the InnoGear Suspension Clip. This clip makes your podcast convenient and you can position the microphone anywhere you want.
Garageband (or Audacity)
Garageband is an easy software for beginners to use as it has a pretty simple interface. It is also free. If you have any queries, you can look up tutorials on YouTube. Unfortunately, it works only if you have a Mac iOS. Therefore, the alternative to Garageband is Audacity.
Skype and Ecamm Call Recorder
Using Call Recorder for Skype, you can record either audio or video calls very easily.
After you finish recording you can convert it into an MP3 or other file type and you can upload it in the podcast hosting site. However, Call Recorder is only available to a Mac user. Or you can use Zoom or Zencastr for your podcast shows.
Fiverr
Fiverr is the best platform to find a logo or introduction for your podcast. You can get everything you want at a price starting from $5 to $25. This is the best way to get started.
Libsyn Podcast Hosting
You need a host for your podcast so that you will get an RSS feed to submit it to iTunes and create a database for your podcast. Libsyn is a dependable Podcast Hosting site that starts its service at $5 per month and expands up to $15 or $20 per month.
Start a blog for your podcast
This will give your podcast an extra edge and creating a blog will be a prudent decision. Having a blog not only interests people but also other advertisers and sponsors. If you want to earn from your podcast, then you need to create a blog.
CONCLUSION
Now that we have discussed everything, what are you waiting for? Get all your equipment and start working on your podcast. A lot of this equipment is comparatively cheaper than the other equipment available in the market. Though you have bought the best microphone, that alone doesn’t count for the success of your podcast. Please keep in mind that only the audience and the number of people who download your podcast will help create a successful podcast. Though we have compiled the resources, it is up to you to buy what you need according to your interests.
