

Section One: Introduction
iMovie is a state-of-the-art editing software provided by Apple. Its easy-to-understand interface and user interface make it a favorite destination for beginners to use. However, adding voiceovers has always been a difficult thing to do.
This article will explain the step-by-step process to add voiceover on both the ios app on iPhone and the software on Mac.
Steps to add Voiceovers on Mac
1. Import the required video or record the video without any voiceovers
There is a “New” option on opening iMovie with a huge plus sign on it. This will allow you to create a new project. Tap on this and create a new project by importing a video without voiceover or recording the required video without any voiceover.
2. Adding the voiceover on iMovie
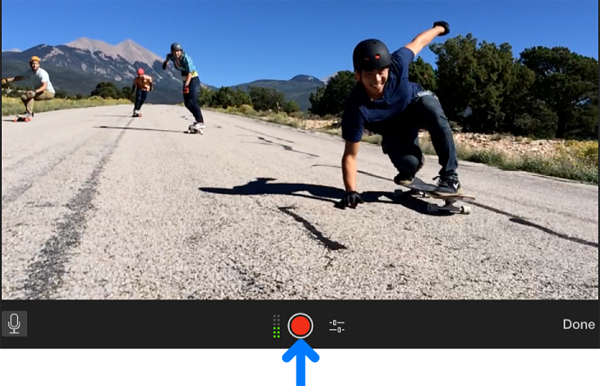
There is a toggle voice recording option under the iMovie tray. It is a circle. The record button is chosen only after choosing the right playhead position on the timeline. Alternatively, you can click the spacebar on your keyboard to toggle starting and stopping recording as well. The settings icon near the red button allows you to adjust mic settings while recording audio. It lets you mute background noise and record the required voiceover.
3. Editing the voiceover recorded
Below are some screencaps from iMovie 10.1 showing you how to edit voiceover.
-
Deleting the original clip’s audio
When editing audio, the pre-existing clip has its audio attached to it. Clicking on it and detaching it from the clip will allow you to add your audio or voiceover to it.
-
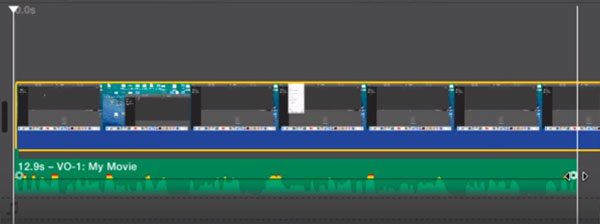
Editing the voiceover on iMovie
Once voiceover is added, there are different toggle controls like fade in, fade out and split, trimming of audio. These allow you to edit the voiceover audio to how you need it.
An alternative way to add voiceover on Windows and Mac
An alternative way to add voiceover to videos on iMovie without using the software is by using Final Cut Pro, an extension of iMovie on Mac. On Windows, users can use Movavi Video Editor, choosing trial. Below are the steps to follow to add a voiceover:
-
Install Voiceover Recorder For Windows and Mac
Movavi Editor is a powerful extended alternative software that adds voiceover. Download and install the app.
-
Make the timeline ready.
Add the video to the timeline using the ‘+’ button. Choose ‘New Project’ and add new files to the timeline using ‘Import/Add new files’ to import files to the project.
-
Record voiceover and edit the project
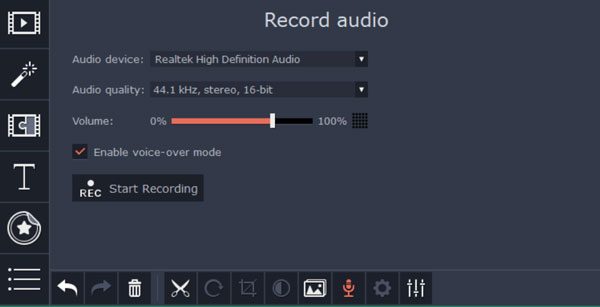
To record and edit the voiceover move the seek position of the play head and click the microphone button to start recording. Enable microphone access and allow permission to record.
After recording, to edit the voiceover added, double click the voiceover to open up tools and edit section, which will allow you to enhance it the way you want. You can add fade-ins, fade-outs, trim, or split the audio to the way you want. You can add other effects by scrolling down and choosing the “Audio Effects” panel are echo, robot, telephone, high pitch, etc. It enhances the audio the way you want it.
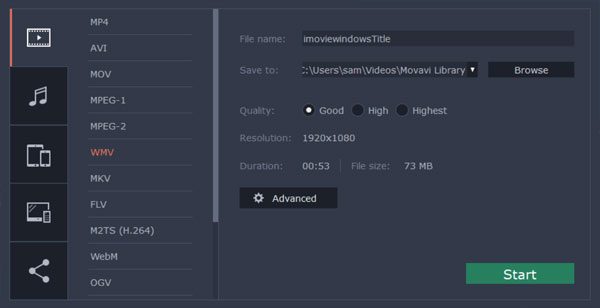
Listen to the preview of your audio, and then click the green button on the bottom right to export what you’ve added and edited.
Adding voiceover on iPad or iPhone
Downloading the iMovie app from the ios App Store will allow you to edit videos seamlessly on your iPhone or iPad. Follow these steps to add voiceover to what you create.
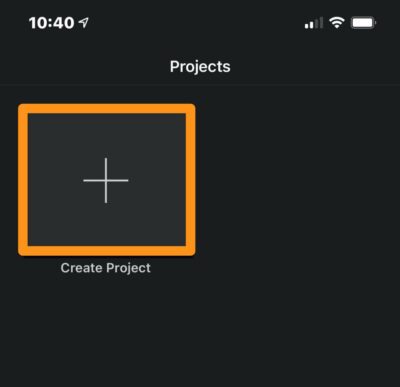
1. Start a new project by pressing the plus sign under which the create project tile is labeled.
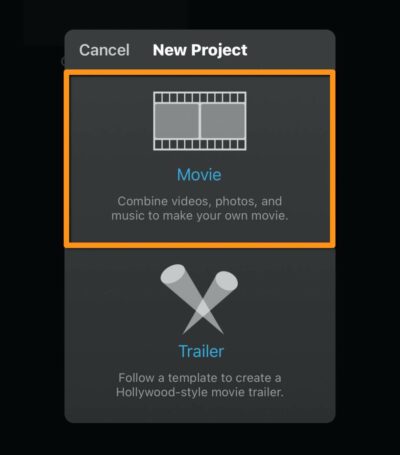
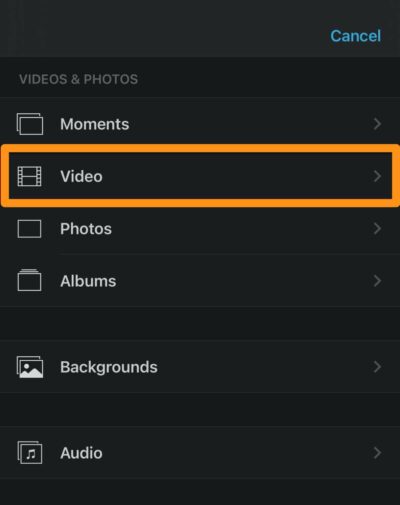
2. Select movie
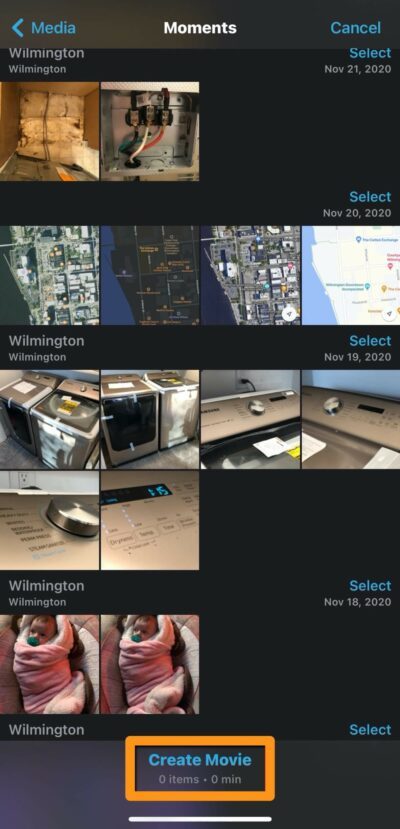
3. Tap create a movie and choose the required clips for the movie. The app will provide optionsa, ,The software will provide options,
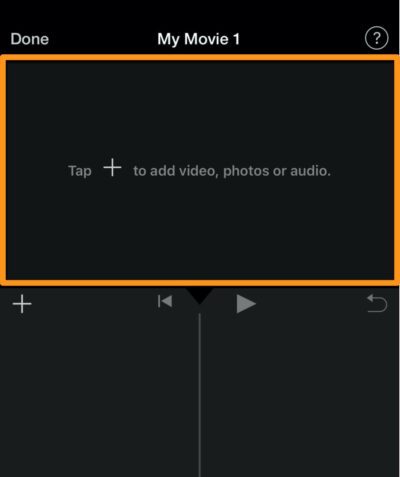
4. Tap the boxed area to add videos
5. Choose video
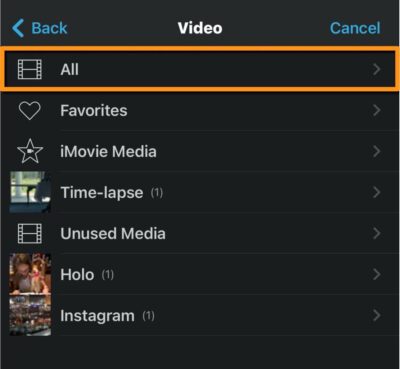
6. Tap “All” to choose the videos required to add to the timeline
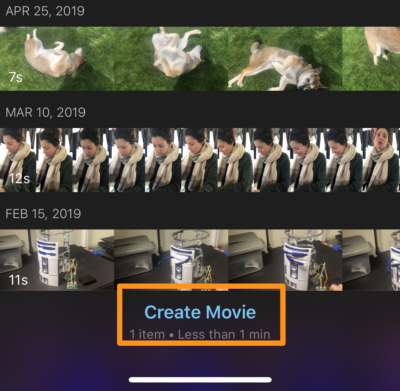
7. After adding the video tap “Create Movie” to create a video timeline of the required clips
8. Once the videos are imported, you can start recording voiceover. For this, make sure the playback seek is in the head of the video, at the starting where the voiceover should start.
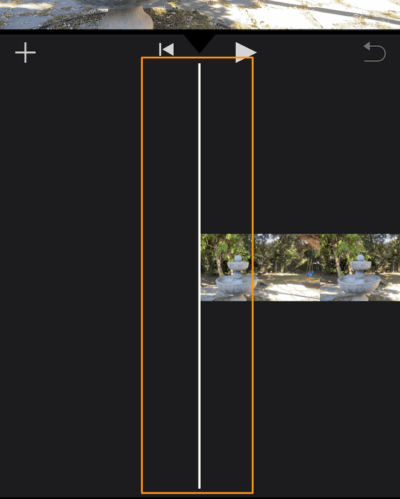
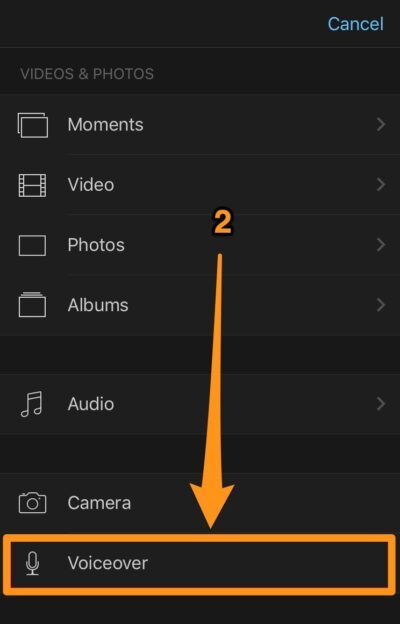
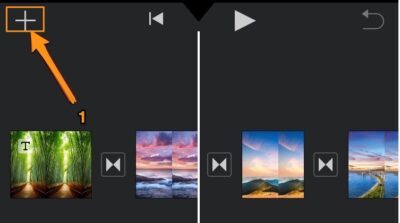
9. Tap the “+” icon and select voiceover
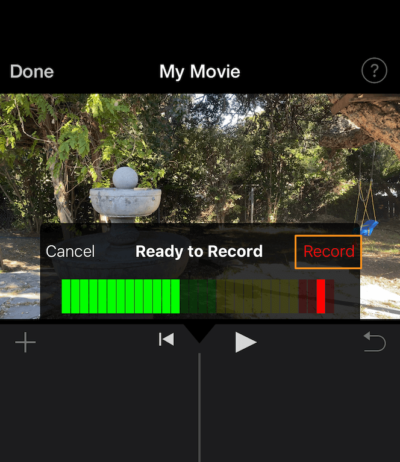
10. Tap record on the top right corner of the screen, The option will give a 3-second countdown before the recording starts.
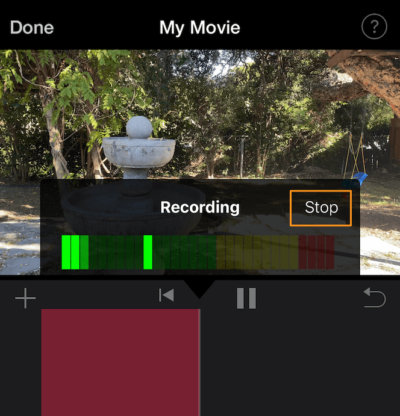
11. Stop recording from the same toggle button that started recording.
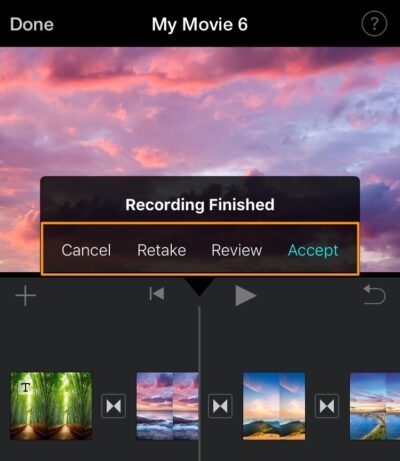
12. Once the voiceover is recorded, options will be provided to Retake, Review, Accept or Cancel what is recorded. If you wish to retake the voiceover, it can be recorded again.
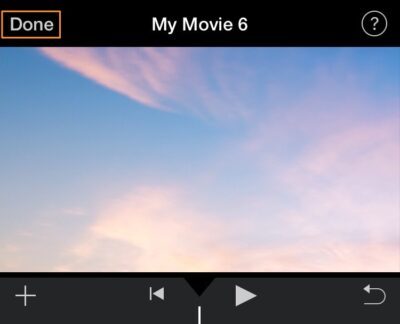
13. On the top left, there is a toggle option “Done” that you can choose once you’re done recording the voiceover.
The best alternative to iMovie: Animaker
Animaker is the best alternative to iMovie which allows you to add voiceover to videos. It’s an all-in-one video editing software that allows you to edit videos the way you want and design them in a way that allows easy editing for beginners and video editors. It works on all browsers: Chrome, Firefox, Safari, Windows, Linux, Internet Explorer, etc.
Add voiceover using Animaker following these simple steps
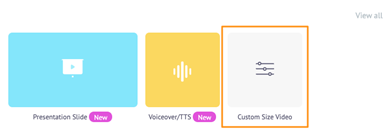
Sign Up/ Login and choose dimensions for your video: Sign in to create a free account or avail a freemium plan. Choose the dimensions for your video, whether you want it to look square, rectangular, or horizontal/ vertical.

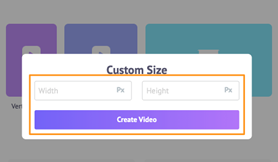
If you don’t like the templates available you can also custom size your video by choosing your preferred dimensions.
Next, add your video to the timeline and add a voiceover to it
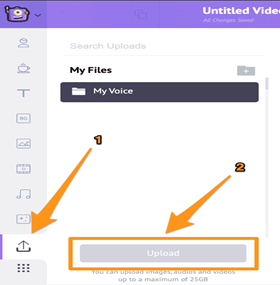
To upload video pick the upward arrow option and then upload once it loads
Click the video to make it appear on the canvas where you can make other changes
To add voiceover there are two methods to be followed on Animaker
- You can record your own voice as the voiceover
- Create audio automated voiceovers by entering required text
To create your own voiceover click the video timeline and then click the microphone toggle option on the bottom left corner to record
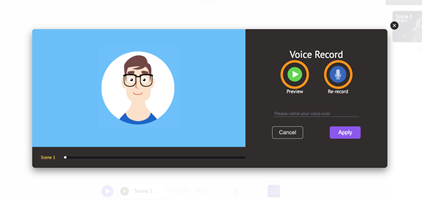
Now a popup will appear with a round icon and a microphone on it. Click it to record your voiceover.
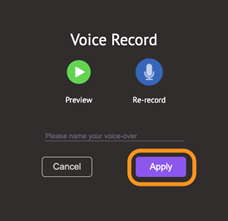
Following this, options to edit, re record or approve what you’ve recorded will appear. Choose what you need. Preview your recorded audio and approve it if you’re satisfied or re record your audio to create a new voicoever.

To generate voiceover from text choose text to speech from the drop down window on the same location
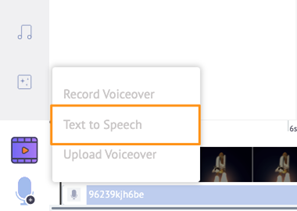
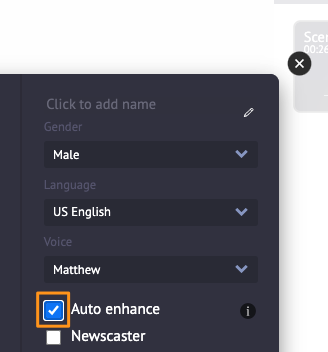
A popup window will appear where you can enter the text that will be converted to speech. You will be able to choose the Gender and voice of the voiceover generated for your text to speech option.
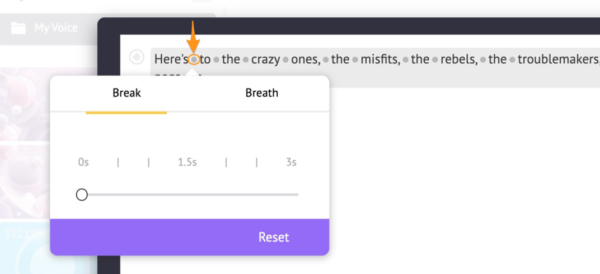
Click on the round button on the top left corner of the window to adjust the pitch, volume or speed of the voiceover.

To undo the changes you’ve chosen click on the reset button
Between each word, you can add breath breaks or choose how long the words should last.
Another option you can avail of is for the AI to completely choose what to do with the voiceover instead of manually personalizing the voiceover. The auto-enhance options automatically tweak everything to fit into the right preferences.
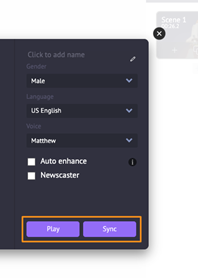
After this click on the sync button and play button to test what you’ve set
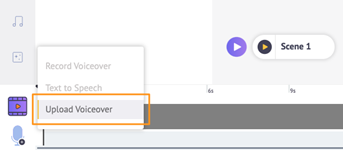
You can also upload a voiceover otherwise recorded. Import this the same way you would add other files to Animaker
Click the voiceover to tweak other things to reveal pop-ups that allow you to tweak it the way you want.

Preview the video and download it by tapping the play button on top
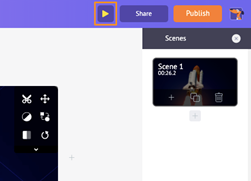
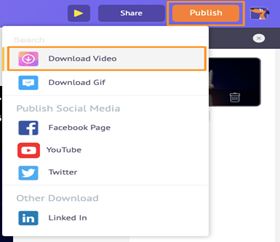
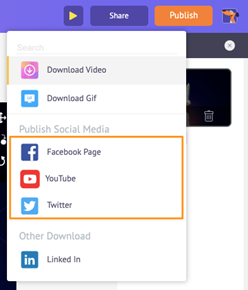
To download it as mp4 click publish and save the video or directly publish it into various social media platforms directly
Conclusion
It is always helpful to add any kind of voiceover that includes a narrative to the videos. It keeps watchers engaged and interested in the video. It is easy to follow. The article goes along on how to add these voiceovers onto iMovie a state-of-the-art video editing software that many people use and hopes to provide direction on how to do it to provide a clear direction and understanding to users.


